PhotoMatch V.2 – by: base80
October 18th, 2005
PhotoMatch Tut 2 Statue

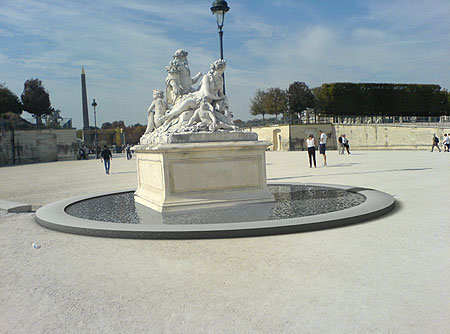
For our second tut we will make a pond around a statue. I will very quickly cover the matching and explain what to do once the match is done.
Here is the final result for this tut.
Follow up:

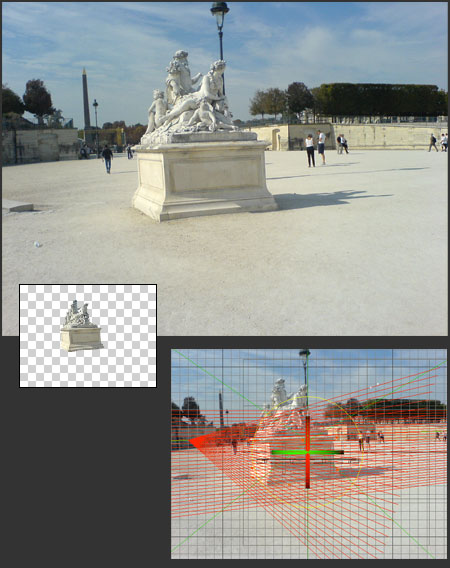
So let’s start by choosing a nice photo on our hard-disk. Open the photo in psd or equivalent. What we need is the statue cut out from the background, we will need it later as an alpha channel in a texture.
Open c4d and add PhotoMatch(PM) from the plug-in menu. Load the original image in PM and create a new camera.
Do the match as you did in the previous tutorial. Follow the lines of perspective and the camera will be set. OK

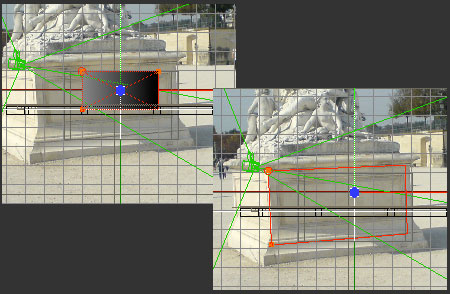
Create a cube to match the size of foot of the statue.
Track the cube to the foot in Tracking mode. Voila the position of the camera is automatically set, super.
I created the pond around the statue and I put water in it. What we want is to have the statue and the background reflect in the water and we want the statue to cast shadow on the water and the border.

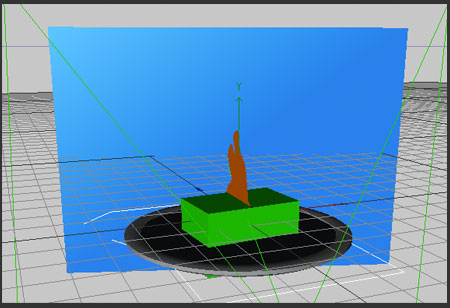
Now copy the texture PhotoMatch created automatically and add a alpha channel with the image edited in psd, and stick the texture to the cube. The cube is now reflecting in the water of the pond. Cool. Put a compositing tag to the cube and uncheck cast shadow, receive shadow and seen by AO, so the cube only reflects and nothing more. Next we create a plane just behind the pond and stick the background texture on it and we add the same compositing tag. This plane will reflect in the water of the pond.
The last thing is the shadow of the statue. What I did is to make a rough spline that looks a bit like the side view of the statue, this is improvisation. Put the spline in an extrude set to 0,0,0.
Green = the reflection cube with the texture with alpha,
Blue = the plane to reflect in the water around the statue,
Orange = the silhouette of the statue to cast shadows
Now you have to improvise the position of the light to get the right angle.
I forgot to say you have to check “compositing background” in the compositing tags.
This tutorial is a very fast overview of how to integrate objects in a photo with the right shadows and reflection. I skipped a lot of easy things as I expect users of the plug-in to have quite advanced skills in c4d, but I hope it was not too fast.

