PhotoMatch Tut 1 Interior
PhotoMatch V.2 – by: base80
October 18th, 2005
Every PhotoMatch starts by choosing a picture you want to work on. And generally you have an idea of what you want to achieve.
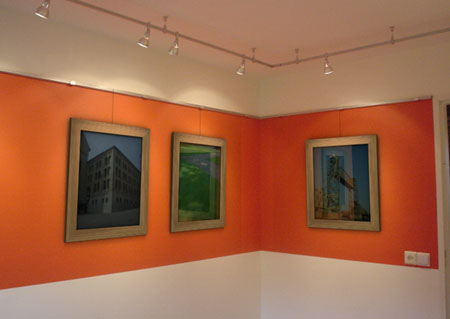
In this case we want to add picture frames to a room.
Here is the final result, do the tutorial and you will get the same.

Follow up:
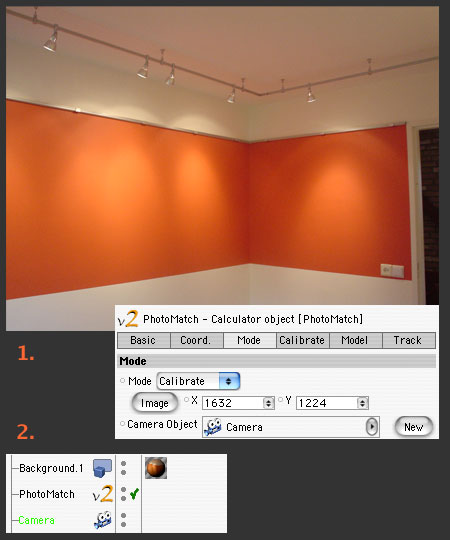
To get started create a new document and choose PhotoMatch from the plugin menu. It will add PhotoMatch to your Object manager.
Click on the PhotoMatch object and then click on “image” and choose an image on your hard-disk. This will automaticaly set the image as background of the front view and create a texture with the same image and create a background object.
Then click on “Camera”, this will create a camera to work with.

PhotoMatch is set to “calibrate” mode as default.
In the front view you can see some arrows, go to the calibration pane of the photomatch and try to drag them to perspective lines in your picture as shown in the above image. This will automatically set the right focus and rotation of the camera. You can switch on and off left and right to get a clearer view and you can show guides to check if you are right.
OK, now your camera is almost set, the only thing is that the camera is still at 0.0.0.
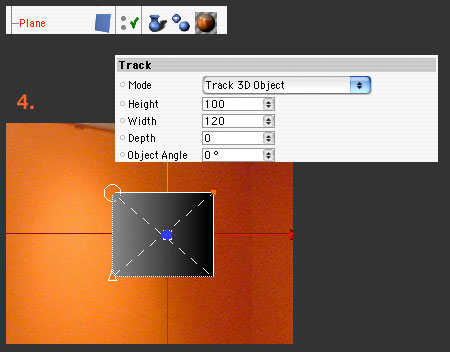
What we need to get the camera in the right position is to track an object.
What I did is to create a plane approximately the size of the orange wall on the right. That is 100 high and 120 wide.
Go to the “Track” pane of PhotoMatch, leave it in “Track 3d Object” mode and try to match the given rectangle of PhotoMatch to your object, in the front view.
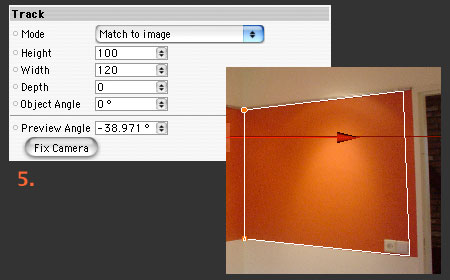
If this is done correctly you can switch to “Match to Image” mode.
Still in the front view you have to match the given rectangle to the right place in your image, pull the handles to match the size of the rectangle and hold down Ctrl to rotate the rectangle. In your perspective view you can see that the camera has moved to another place and that its view matches your object on the background.

At this point your calibration is finished, you can start adding objects to the scene.
I have added some picture frames and I tried to make the light look the same as in the original image.
I used Ambient Occlusion for the rendering, so therefore I added planes behind the picture frames.
