Hair “Target” (R.10.5)
Textures, Hair – by: base80
October 3rd, 2007
Well I am at it again. I am discovering the new features in Cinema4d R.10.5 and enjoying it.
One of the new features is Hair targeting, that is a nice feature.
This tutorial only covers how to use targeting, not what you could do with it.

Follow up:
First of all I would like to say that “Target” is a big word for what really happens, it is more a repulse and attract feature in the Hair shader. The target does not influence the roots but only the result in the rendering.
OK how does it work.
Lets start by adding a plane and a sphere to the scene. Add hair to the plane and lift the sphere above the plane.
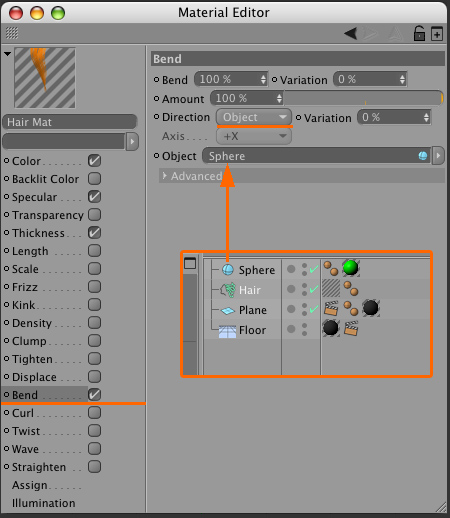
Open the HaIr-shader and click on the “Bend” channel. See the “Direction” pull-down menu, set it to “object”.
Now drag the sphere into the Object field. Voila that is it.

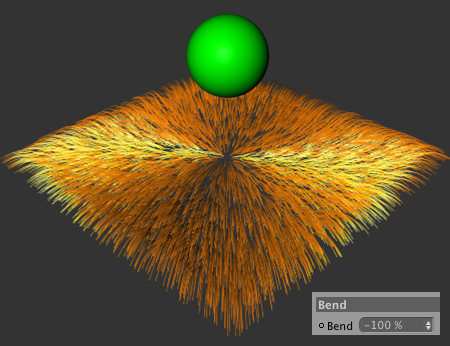
Well there is not much to it really, you can change the curve of the hairs in the advanced tab. Or you can set a negative value to the bend so the hairs repulse from the objects.

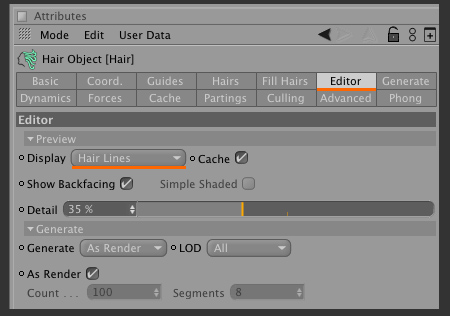
As the target feature works on the material level and not on the guides you will not see much in the editor window. You have to render previews as you go along. But there is a trick to see-what-you-get in the editor while editing.
Go to the “Editor” pane of the Hair object. Select “Hair Lines” from the pull-down menu and you will have a preview of the targeting in your preview.

I am not totally convinced of this new feature of Hair. You can not set complex objects or splines to bend hair to. It only works with simple objects. (hit me if I am wrong)
Well enjoy!
Animations will follow as soon as I have the Cinema4d release (this is the demo)
