Egg modeling tutorial
Work in Progress, Modeling – by: base80
March 13th, 2009
I had to do this tutorial for the sake of history. After a very funny thread on c4dCafé I noticed there is a whole subculture of Egg modeling strategies
These two web pages will teach you how to do the Egg modeling.
Egg Primitive Plugin
Splendid Egg video tutorial
Point by point on blueprint method
And here is the subject on C4dCafé
OK Lets get started on this one…

Follow up:
To get started properly you will need an empty document open in Cinema4D (ctrl-N on windows and cmd-N on mac)
This will look like this:

The first step is to add a “Cube” to the scene:

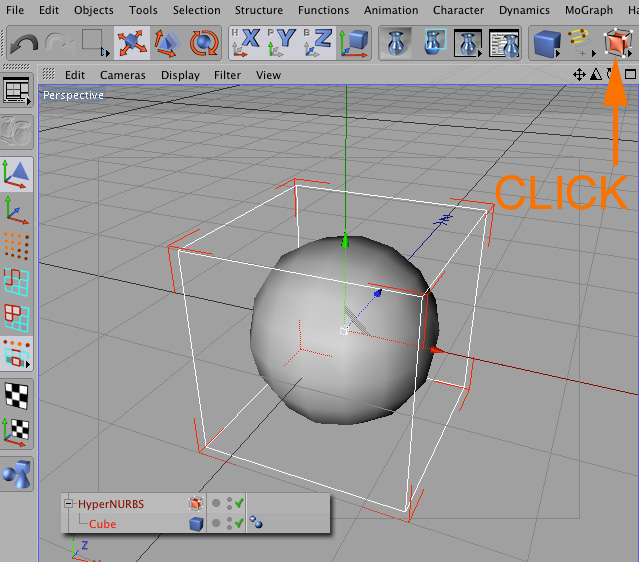
Next step is to drag this “Cube” into a HyperNurb, you will notice that the cursor changes into a square with an arrow while dragging in the Cube, this means it is all OK.
You will notice at this point the cube has become round in your view port. This is normal.

Hang in there we are half way.
Now we have to make the Cube “Editable”, there are several methods to do that, foremost you could hit the “make editable” icon shown in image below, or you could go to the “Functions” menu and release your mouse on “Make Editable” or if you can remember this you could hit the “C” key on your keyboard (this is for advanced users)
You will notice the icon just left of the cube in the object manager has changes to a triangle (this is not a bug)

Now comes the part usually referred to as “Box Modeling” or “Low Polygon modeling” This is a way of working with the minimum number of polygons as possible. The HyperNurb will take care of smoothing things for us.
In the next step we have a choice of at least two methods.
1. Use Polygon tool
2. Use Point tool

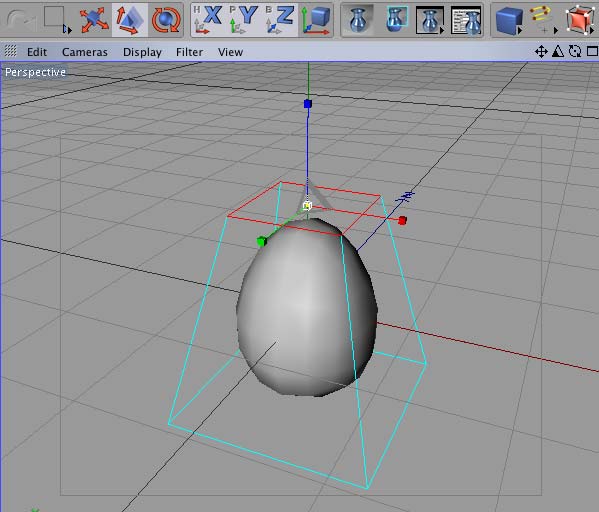
As seen above I made a selection of the top polygon or the top 4 points using the selection tool.
Here comes the WOW part of this tutorial (if you are not sleeping already)
Using the “Scale Tool” (shortcut T) and by dragging gently in the viewport from right to left you will try to make the selected points or polygon approximately twice as small as it was. You can do this numerically in the Coordinate manager in the middle column in the X and Z boxes.

Yeah this looks quite like it.
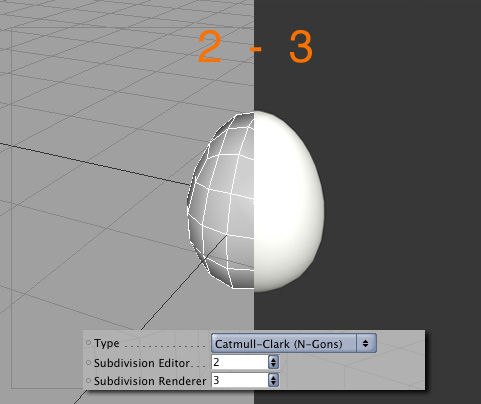
You will see that the egg is a little bit edgy in the viewport but it renders much more smoothly in the final render. This is one of the nice things of the HyperNurb, it has by default a different resolution in the viewport than in the final render. You can override this if really necessary.

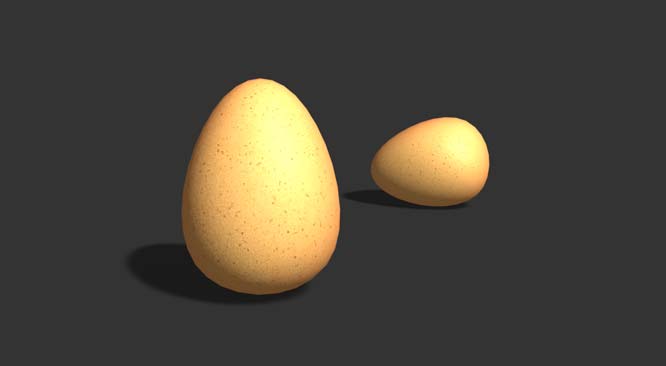
And here is the final render, the texture is made by Gaazmaster of France (yes, they know how to make egg shaders by nature)

And… as you may have seen in the Video tutorial, don’t forget to name the cube “Egg”. You will have to learn to have a clear naming protocol to help you manage larger projects in the future.
Same tutorial but shorter:
Take a cube
Drop it in a HyperNurb
Make it editable
Select top polygon
Rescale it
Please send me a comment if I forgot to specify one or the other phase of the egg making thing.
There are many ways to model things…
The egg could also be done with deformers on a sphere or simply with a spline in a LatheNurbs object

